To add classes or students, you must be an admin.
Create new class
- Classes > Add new

- Select Classroom: In this Learning Portal, a “Classroom” refers to the consistent elements of a class, such as Grade Level and Teacher, which remain unchanged from year to year. Each year, students are added to this existing classroom. A “Class” denotes a specific group of students. For further details, please refer to the articles See these articles: “Setting Up a Classroom: Step-by-Step Guide” and ” Anatomy of a Class” for more information.

FYI… What you should know before you add students
Adding Students Made Easy:
This system offers multiple ways to add students, whether they’re in the Learning Portal from previous years, currently enrolled for this year, or brand new to the system.
Smart Sorting:
Simply upload your class lists, and our system automatically identifies and categorizes students, distinguishing new entries from existing ones. This is especially helpful for managing parallel classes where students may move between them.
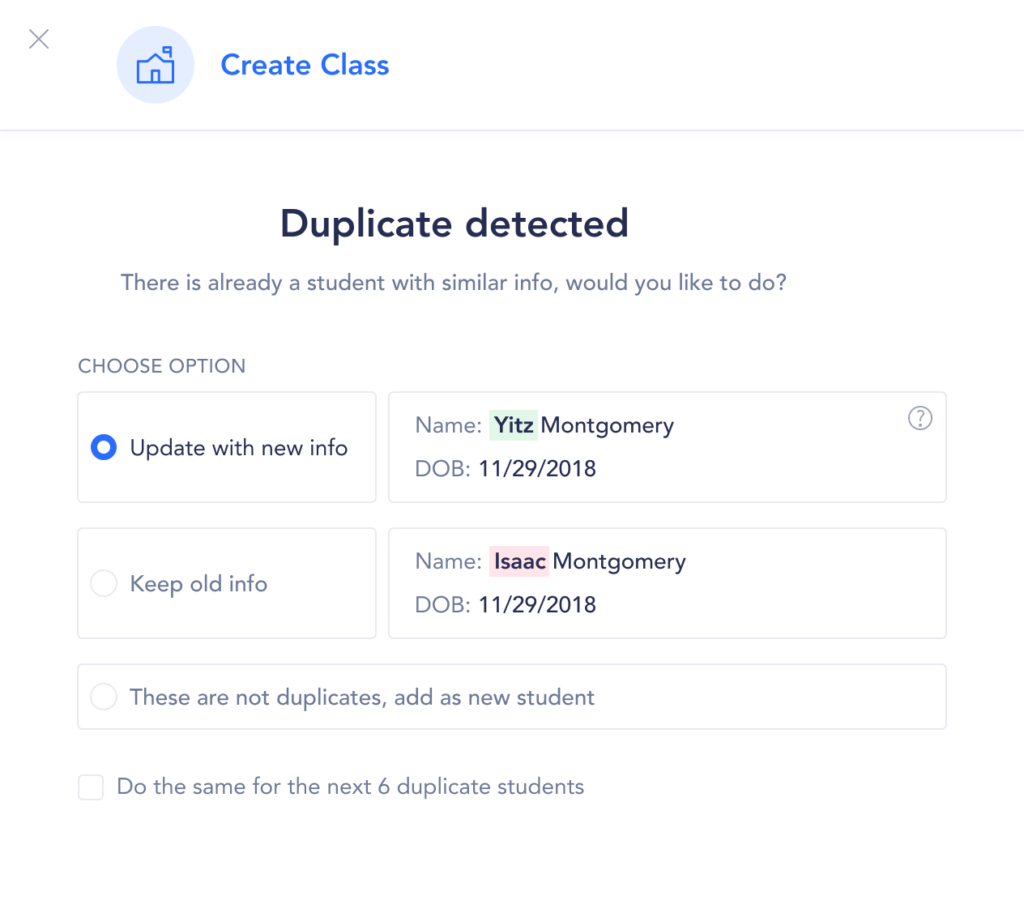
Duplicate Detection:
Even if a student’s name has minor spelling changes (corrected last name, etc.), our system flags potential duplicates and suggests matches when applicable.
New vs. Existing:
To simplify this process, we provide immediate information for each student as they are inputted, indicating whether they are a new addition or already exist in the system. A “new” badge will appear to the left of a student if they are newly added, while an edit badge will be displayed next to students already in the system.
“New” Badge:
If a new badge appears but you suspect a duplicate, check the student page or suggested matches in “Create Class”.
“Edit” Badge
Click the edit badge to modify existing user details.
Date of birth (DOB): This field is required and serves multiple purposes.
- Distinguishing similar names: DOB prevents confusion between students with identical names.
- Understanding performance: In younger grades, age can significantly impact learning. DOB helps us interpret academic performance within the appropriate developmental context. For example, if a student is nearly a year younger than their peers and struggles with Kriah, it may be less concerning, as the struggle could be attributed to the child not being developmentally ready, and the necessary skills may naturally improve over time.
- Identifying learning challenges: A student’s age, combined with their learning progress, can help uncover potential learning disabilities. For example, if an older student is facing challenges, it raises a red flag for potential intervention. This suggests that the student’s struggles may be indicative of a learning disability.
- De-duplication: Matching DOB and first or last name helps identify possible duplicates.
Add students
Typically, the simplest way to add students is by uploading a spreadsheet.
Efficiently Add Students via Upload
This method works for existing students in the system and those you need to add for the first time.
-
- Click on “Upload” for the quickest class addition method.

- Download the provided template on the subsequent screen.

- Paste the class list into the template.
***Make sure that there are no line breaks or commas in the CSV file that you are using.***
- Upload the completed template.
- Click on “Upload” for the quickest class addition method.
Manually Add Students to the Form
1. Select Add Student

2. Fill in student information (Parent information is optional)
3. Select ‘Add Student’
Include Existing Students in a Class:
Utilize this option to add students who are already in the Learning Portal but not yet assigned to any class for the current year.
- Select “Add from Existing”

- Search for students by name or by class

- Click “Add Selected”
Create class
-
- Once you’ve finished adding students, click on “Create Class.”
- If there are sufficient available seats and no duplicate suggestions, the class will be successfully created. If additional seats need to be purchased or duplicate issues arise, the system will guide you through that process.
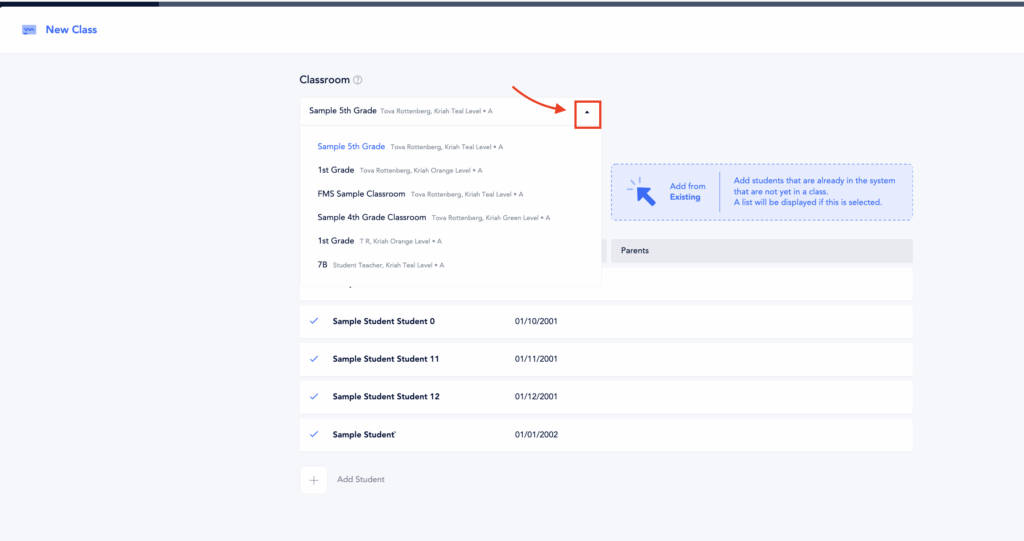
FYI: If you selected the wrong classroom when creating a class, you can easily move the class to the correct classroom by clicking the arrow next to the classroom name and selecting the appropriate one. This action will transfer the entire class to the new classroom.
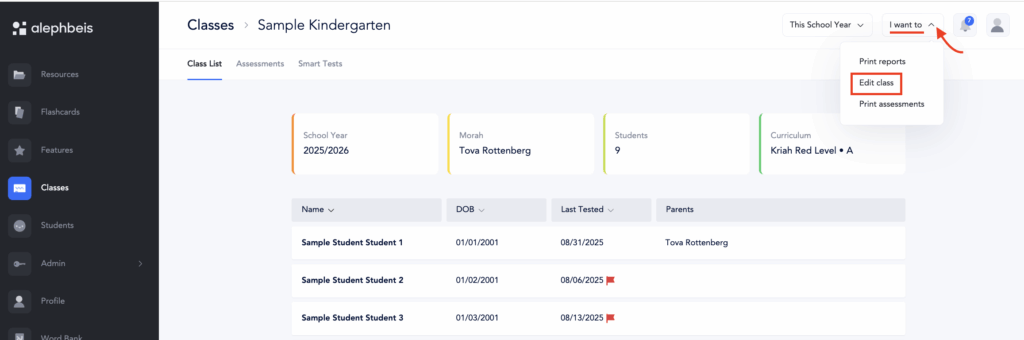
After the class has been created, you can still move it to a different classroom by going to Classes and editing via the classes page.
However, once assessment data has been entered — whether through paper assessments or Smart Tests (individually or as a class test), the option to move the entire class to another classroom will no longer be available. In that case, refer to this article for instructions on how to move individual students to another class.